Building a macOS screen saver in Kotlin
2024-03-05 • Márton Braun
Update, October 2025: Added a section about macOS Tahoe.
This article documents how I created my own custom screen saver for macOS, built almost entirely in Kotlin, using the powers of Kotlin Multiplatform to target macOS.
The inspiration for this project was the KotlinConf 2023 idle video, which had Kotlin’s logos through the ages bouncing around the screen, in the style of classic DVD player screen savers.
When I found out that this was a pre-rendered video, and in fact not a screen saver I could just grab and start using, I figured it’s a nice challenge to try to build it — in Kotlin, of course.
Here’s the end result:
I also went a bit further, and added customization options. These include a second logo set (images of Kodee instead of the Kotlin logos), and options to configure the speed, size, and number of logos bouncing around.
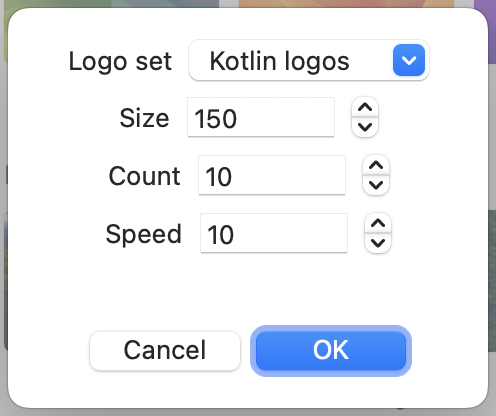
This way you can choose for yourself, whether you’d prefer a single Kotlin logo bouncing around, or a hundred Kodees:
You can find the code for this screen saver in the GitHub project ⭐️, where you’ll also find release binaries and detailed installation instructions.
If you choose to use this screen saver and enjoy it, I’d really appreciate it if you shared it on social media and tagged me in the post!
I’m also happy to accept improvement ideas and PR contributions to the repository. I’ve managed to cobble this together with no macOS development experience, I’m sure there are many things that could be done in a nicer way.
Now, let’s see how I got here…
A word of warning
This probably sounds great so far, so it’s high time for a word of warning. Here be dragons. And creatures APIs much scarier than dragons. Don’t say I did not warn you.
Creating a custom screen saver for macOS is a barely supported use case, with little to no documentation, which takes you through a perilous path. The problems aren’t with Kotlin or interoperability — this whole system in macOS is rotten. I did my best to document my struggles here.
If you want to follow in these footsteps, I wish you the best of luck. You can find a starter project creating a Hello World screen saver with Kotlin in this repository.
Just using a custom screen saver can be troublesome too, but I think this one should be perfectly fine to use if you like it. I’ve tried hard to make it a well-behaved process, as you’ll see detailed later on.
Table of contents
This is a long post. Here’s what you’ll find in it:
Setting up
Still here? Let’s get rolling.
Getting the basics working
To get started with building a screen saver, you can create a project using Xcode’s project wizard, selecting the macOS category and then Screen Saver.
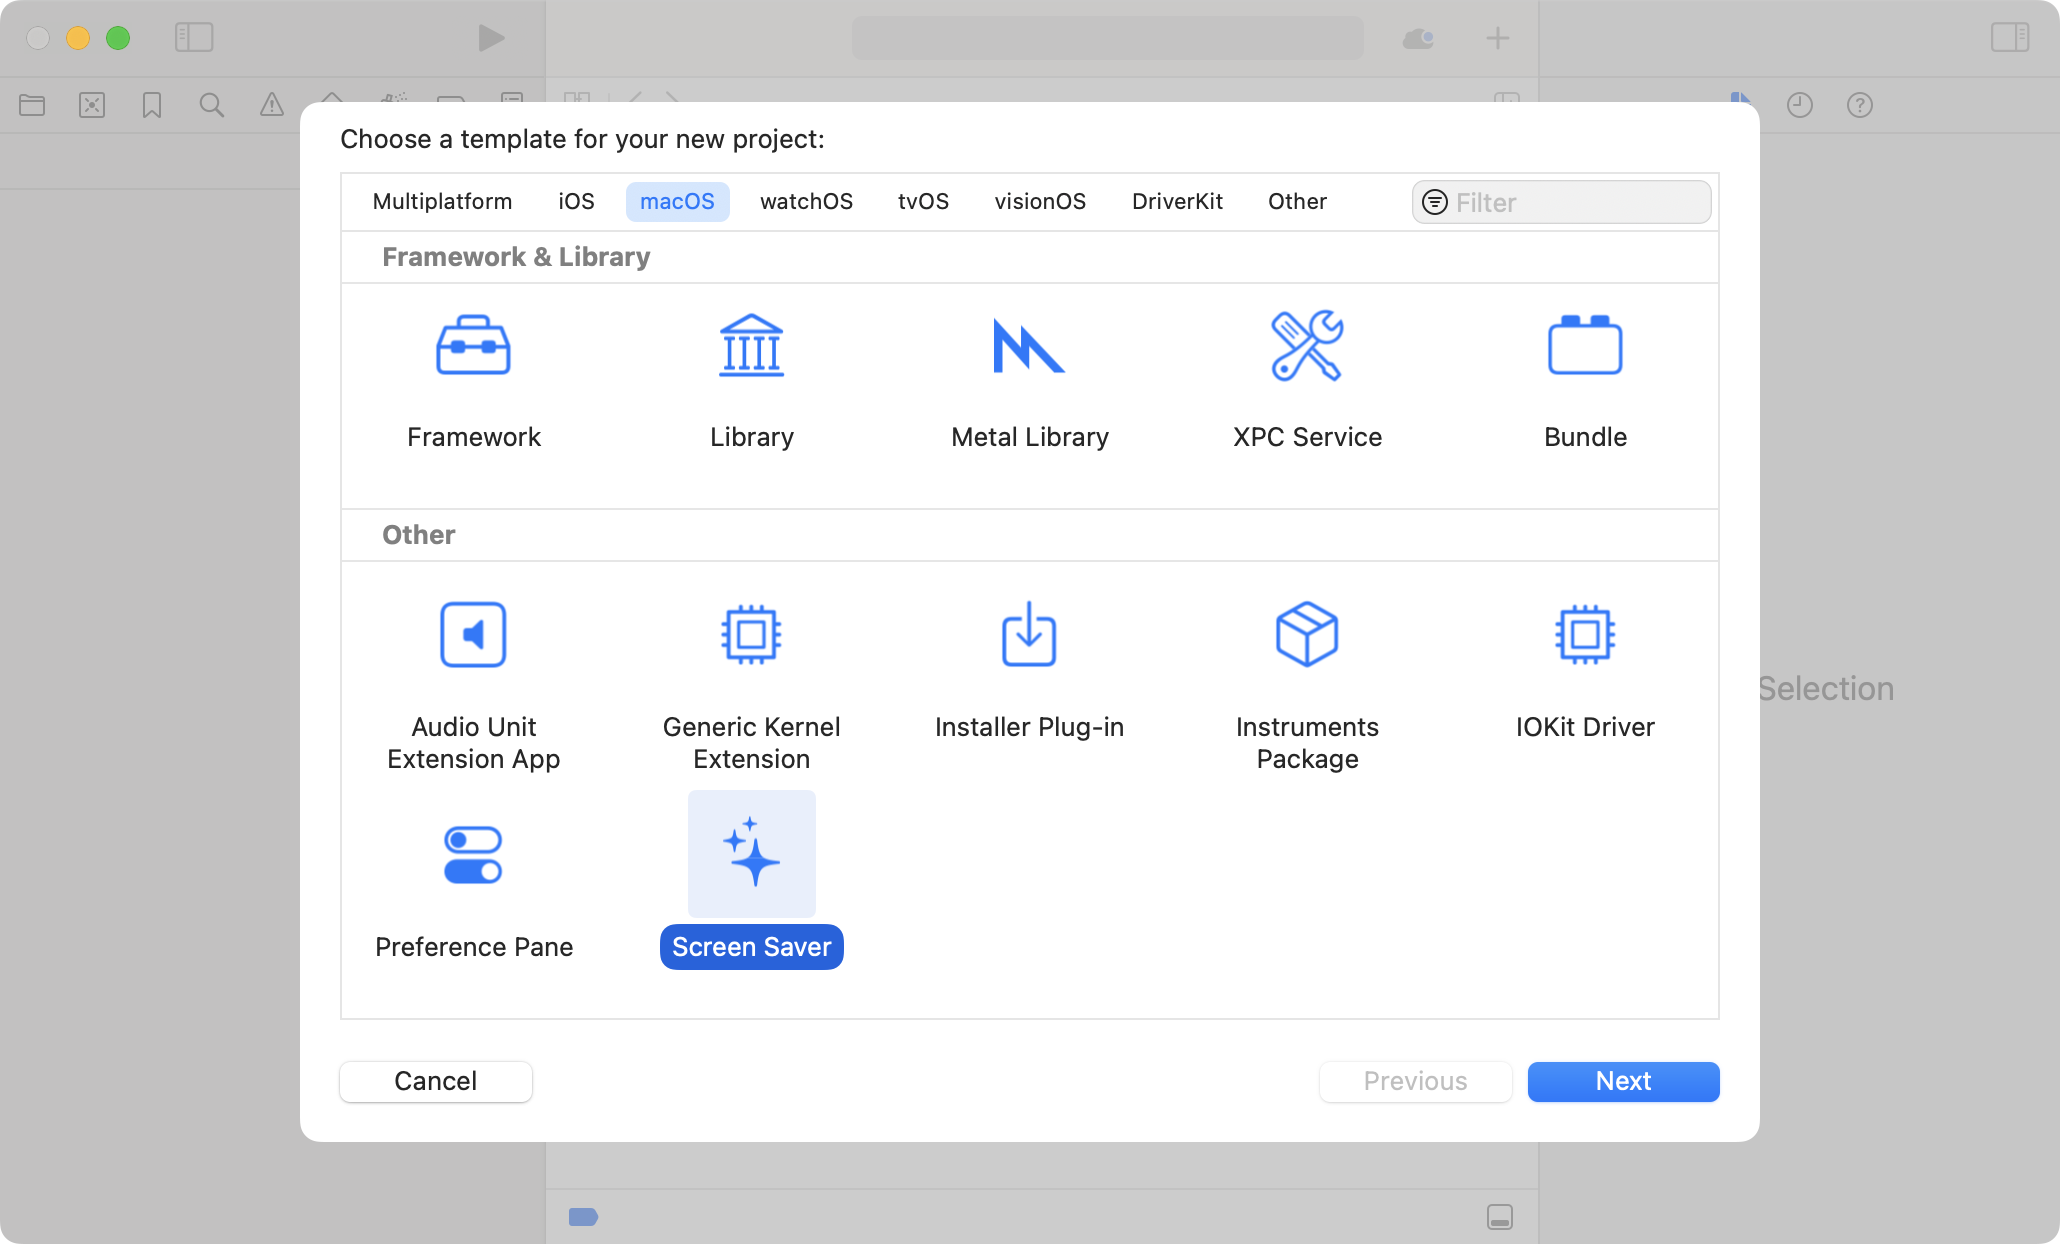
This gives you a project with a blank ScreenSaverView in it that renders nothing at 30 frames per second, with… 🥁… Objective-C code!
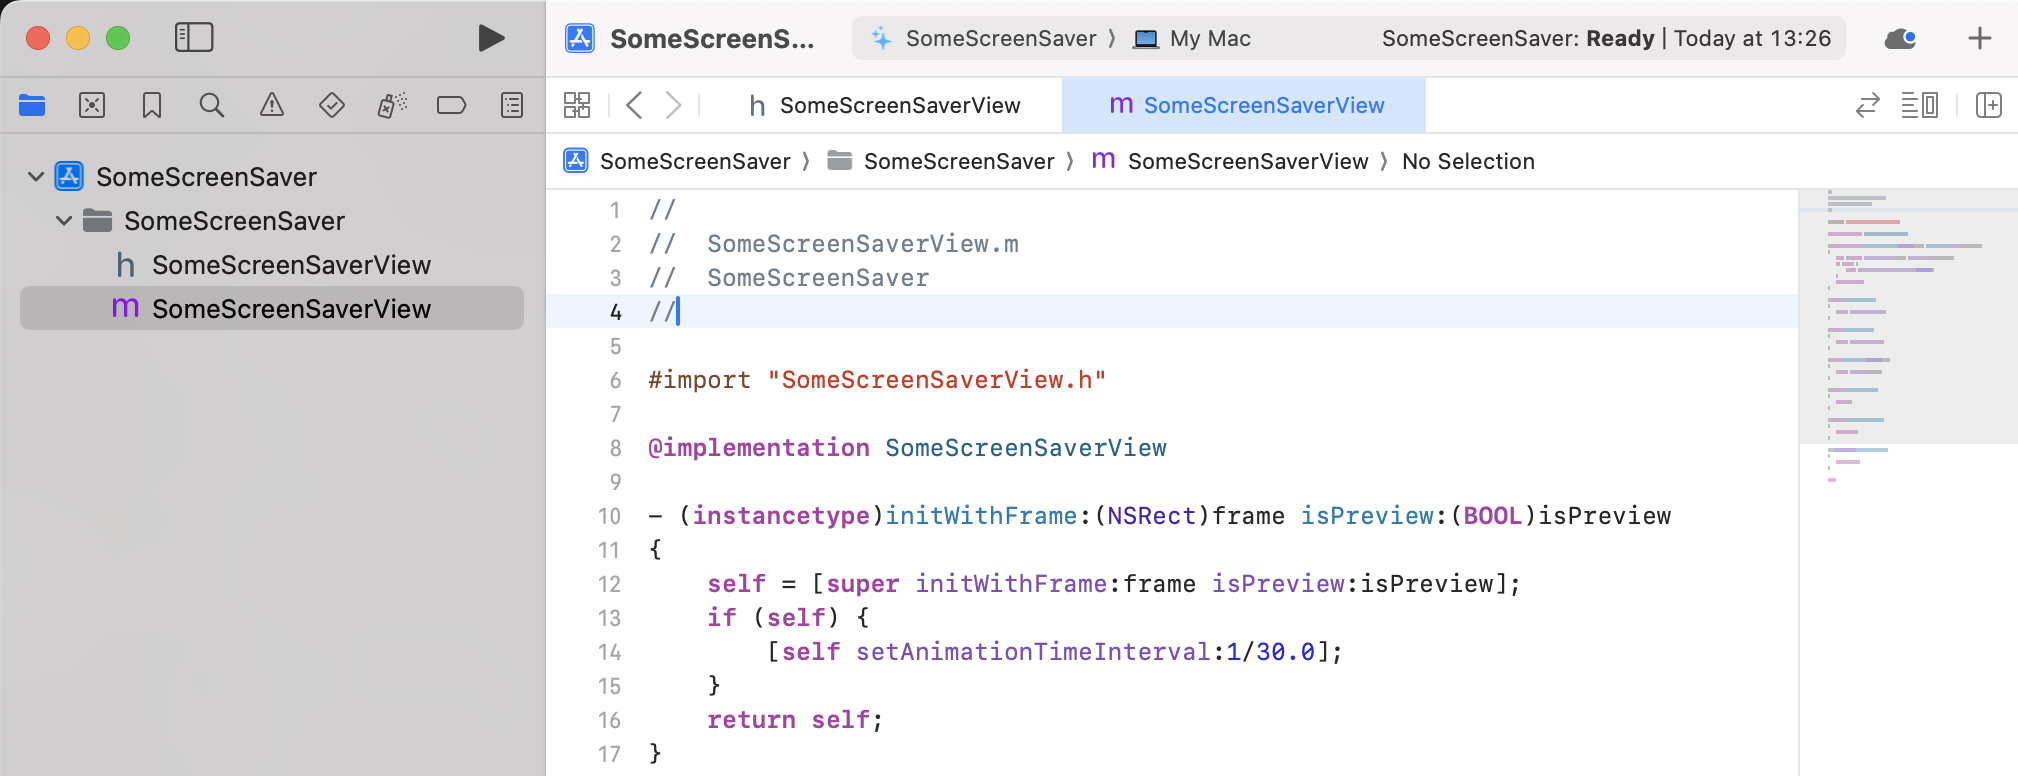
As I was browsing old posts (which are the only posts you can find on this topic, really), I found many complaints that screen savers may only be implemented in ObjC and not Swift. Luckily, this has improved since then, and Swift works just fine as well. With that, we can convert the starter code to Swift.
import ScreenSaver

class KotlinLogosView : ScreenSaverView {
    override init?(frame: NSRect, isPreview: Bool) {
        super.init(frame: frame, isPreview: isPreview)
        animationTimeInterval = 1 / 60.0 // Bumped to 60 fps
    }

    required init?(coder decoder: NSCoder) {
        fatalError("init(coder:) has not been implemented")
    }

    override func animateOneFrame() {
        super.animateOneFrame()
    }

    override var hasConfigureSheet: Bool { return false }
    override var configureSheet: NSWindow? { return nil }
}
ScreenSaverView
The reference documentation of this class provides an overview of its methods, while the screen saver documentation gives a basic overview of its behaviour.
Let’s examine its contents briefly:
initis where your setup logic goes. You get access to anisPreviewparameter, should you want to draw your screen saver differently in the preview that’s shown in System Settings than when in “production”. An overload that takes anNSCoderis also required, but apparently can have an always-failing implementation.animateOneFrameis called periodically as time passes, to be used to update the state of the screen saver (for example, move objects by one step). You can also choose to draw the updated state of the screen saver in this method, which is what I chose to do.hasConfigureSheetdetermines whether there are configuration options available for your screen saver in System Settings, andconfigureSheetis the UI that will be shown when someone clicks the Options… button while your screen saver is selected.
A note about drawing
The documentation of animateOneFrame says:
The system locks focus on your view before it calls this method, so you can use this method to draw content. You can also let
draw(_:)perform the drawing, in which case you use this method to callsetNeedsDisplay(_:)to mark your view as dirty.
So, the choice is either:
- Just update your state and then draw in
animateOneFrame. - Update your state in
animateOneFrameand then callsetNeedsDisplaywhen done. Also implementdrawto perform your drawing, which will be triggered by thatsetNeedsDisplaycall.
I initially discovered the second way of doing this, and I moved to the first one when I realized that that’s also an option. I don’t see why you’d want to go through the draw method.
Delegating to Kotlin
So we have our entry point in Swift, and try as I might, I did not manage to move that class to the Kotlin side of the code. So what I ended up with is a thin Swift ScreenSaverView implementation which instantiates a similar class that’s defined in Kotlin, and then delegates the implementation of its methods to the Kotlin code.
I’ll be omitting some details in the code snippets here for readability, but you’ll always find the full code on GitHub.
import ScreenSaver
import KotlinLogo

class KotlinLogosView: ScreenSaverView {
    let kotlinScreenSaverView = KotlinScreenSaverViewKt.create()

    override init?(frame: NSRect, isPreview: Bool) {
        super.init(frame: frame, isPreview: isPreview)
        kotlinScreenSaverView.doInit(screenSaverView: self, isPreview: isPreview)
    }

    override func animateOneFrame() {
        super.animateOneFrame()
        kotlinScreenSaverView.animateOneFrame()
    }

    override var hasConfigureSheet: Bool {
        kotlinScreenSaverView.configureSheet != nil
    }
    override var configureSheet: NSWindow? {
        kotlinScreenSaverView.configureSheet
    }
}
Let’s see what this calls on the Kotlin side:
fun create(): KotlinScreenSaverView = LogoScreenSaverView()

abstract class KotlinScreenSaverView {
    protected lateinit var view: ScreenSaverView
        private set

    protected lateinit var bundle: NSBundle
        private set

    protected var isPreview = false
        private set

    open fun init(screenSaverView: ScreenSaverView, isPreview: Boolean) {
        this.view = screenSaverView
        this.bundle = NSBundle.bundleWithIdentifier("co.zsmb.KotlinLogos")!!
        this.isPreview = isPreview
    }

    abstract fun animateOneFrame()

    open val configureSheet: NSWindow? = null
}
This is a simple base class, mimicking the ScreenSaverView framework class. It sets up some basic values that will be accessible in the concrete implementation. That implementation is provided to the Swift code by the create factory function above the class.
Before we dive further into the code, now that we have some Swift and some Kotlin, it’s a good time to have a look at what I used to work on this project.
My development setup
Xcode was required for getting started and setting up the project, but with the initial steps done, I could proceed to use Fleet for all the rest of my work. I initially wrote a proof of concept implementation in Swift, and then gradually worked towards moving more and more of the code into Kotlin. Things like cross-language navigation to usages work like a charm here!
Building the screen saver
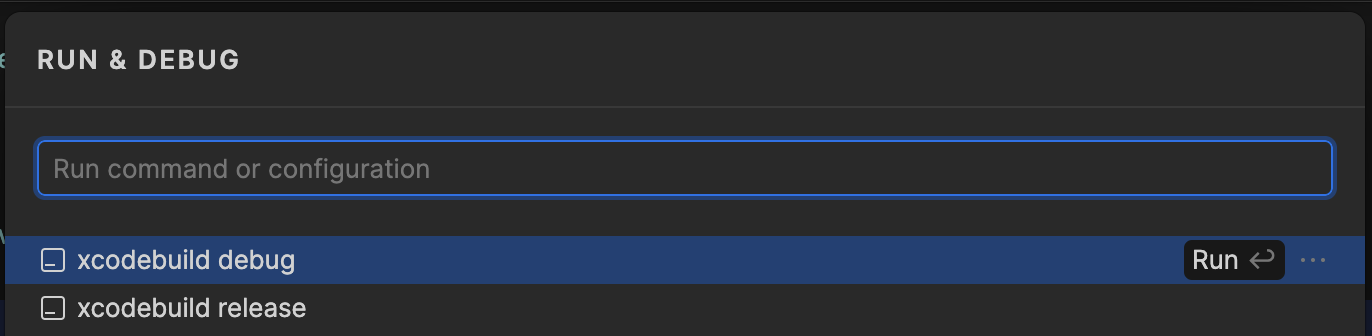
The project can be built from Xcode, but it’s also fairly easy to build it from Fleet. I created the following run configurations in Fleet (.fleet/run.json) to make it easy to run builds:
{
    "configurations": [
        {
            "type": "command",
            "name": "xcodebuild debug",
            "program": "xcodebuild",
            "args": ["-scheme",  "KotlinLogos", "build"],
            "workingDir": "KotlinLogos",
        },
        {
            "type": "command",
            "name": "xcodebuild release",
            "program": "xcodebuild",
            "args": ["-scheme",  "KotlinLogosRelease", "build"],
            "workingDir": "KotlinLogos",
        },
    ]
}
These are conveniently available on the UI once set up:
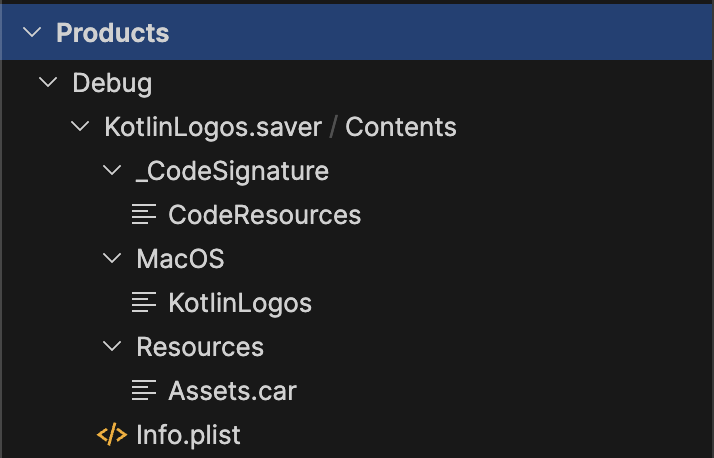
A successful build of the project will produce a screen saver file with the .saver extension. The output folder is somewhat hard to find, in my case it was at a path like this:
~/Library/Developer/Xcode/DerivedData/KotlinLogos-fczypfdumappcugzfailioehwspp/Build/Products/Debug/KotlinLogos.saver
If you’re building in Xcode, you can use Product -> Show Build Folder in Finder to find this folder.
When building from Fleet, I found that the end of the output contains this location as well, making it easy to copy and then cd to or open directly:
/usr/bin/codesign --force --sign - --timestamp\=none --generate-entitlement-der \
/Users/zsmb/Library/Developer/Xcode/DerivedData/KotlinLogos-fczypfdumappcugzfailioehwspp/Build/Products/Debug/KotlinLogos.saver

** BUILD SUCCEEDED **
A neat way of keeping track of this folder in Fleet is to add it to the workspace in addition to the project folder. This can be done by just dragging the extra folder into the Files view:
If you’re ever looking at the Date Modified field of your .saver in Finder, don’t be surprised if you don’t see it updating as you’re running new builds. It seems like it gets stuck at the first time this file was created.
Of course, this isn’t really a file, it’s one of the magic actually-just-a-folder formats of macOS. You can see this easily in the Fleet Files panel.
Installing, removing, and re-installing the screen saver
To install a screen saver on macOS, open its .saver file. This will open System Settings and ask you if you want to install it. If you’re installing an updated version of the screen saver, you’ll get some additional warnings.
Expect about 2–4 popups that you need to confirm each time, as there tend to be buggy duplicate popups created here depending on your OS version, and apparently, the speed with which you accept them.
You might think installing a new build of the screen saver and confirming a couple of times that you want to replace the old one is sufficient for changes to take effect, but you’d be wrong.
There are many, many things you can do “wrong” to not cause the screen saver to be refreshed. It can be quite frustrating trying to check the effects of code changes you’ve made, only to eventually figure out that you never managed to launch the new version.
Here are all the things you can attempt to make sure that your changes are applied:
- Delete your old output files before running a new build
- Build your project
- Go to Activity Monitor and force quit any
legacyScreenSaverprocesses (especially on Sonoma - we’ll discuss this more later) - Go to System Settings, choose any screen saver other than your custom one
- Delete your custom screen saver from System Settings
- Quit System Settings
- Install your new screen saver and perform the dialog dance
You don’t always need all these steps, but you will find yourself in situations where missing one of them somehow makes your screen saver not update. From my latest experience, normally it’s enough to quit System Settings and force quit any legacyScreenSaver processes before installing an updated version.
You can also install or remove a screen saver manually by going to
~/Library/Screen Savers. To install something, place it in this folder. To remove it, delete its file.
Preview problems
If after installing your screen saver your preview in System Settings doesn’t animate, or the Options… button doesn’t do anything when clicked, select another screen saver and then select your custom screen saver again.
Not sure why this is required and whether there’s a nice fix for it.
Development
With those detours about setup and installing a screen saver, it’s time to get into how you can implement one with Kotlin!
Using AppKit from Kotlin
So we have access to a ScreenSaverView instance from Kotlin code. How can we draw on this? The approach I took was to create AppKit views and add them as children (subviews) to the ScreenSaverView. This is made possible by all these system APIs being mapped in Kotlin native with interop, and automatically made available.
For example, to put an image on the screen, you can instantiate an NSImageView, set its image to an NSImage, and use NSMakeRect to create a rectangle describing its on-screen position:
val imageView = NSImageView().apply {
    imageScaling = NSImageScaleProportionallyUpOrDown
    image = loadImage() // Grab an NSImage, for example from assets
    frame = NSMakeRect(x = 300.0, y = 300.0, w = 200.0, h = 200.0)
}
screenSaverView.addSubview(imageView)
To progress this image across the screen, we can simply update the x and y coordinates every time a new frame is requested. This is done by calling NSMakeRect again with the new values and assigning this to the frame of the view:
imageView.frame = NSMakeRect(x = newX, y = newY, w = 200.0, h = 200.0)
To remove a view that you no longer want to display:
imageView.removeFromSuperview()
You can use these interop APIs to easily create and place any type of AppKit views, such as an NSTextView.
Assets
The screen saver needs to contain the various Kotlin logos and images of Kodee. To package these with the screen saver, I’ve added them to the Assets of the Xcode project.
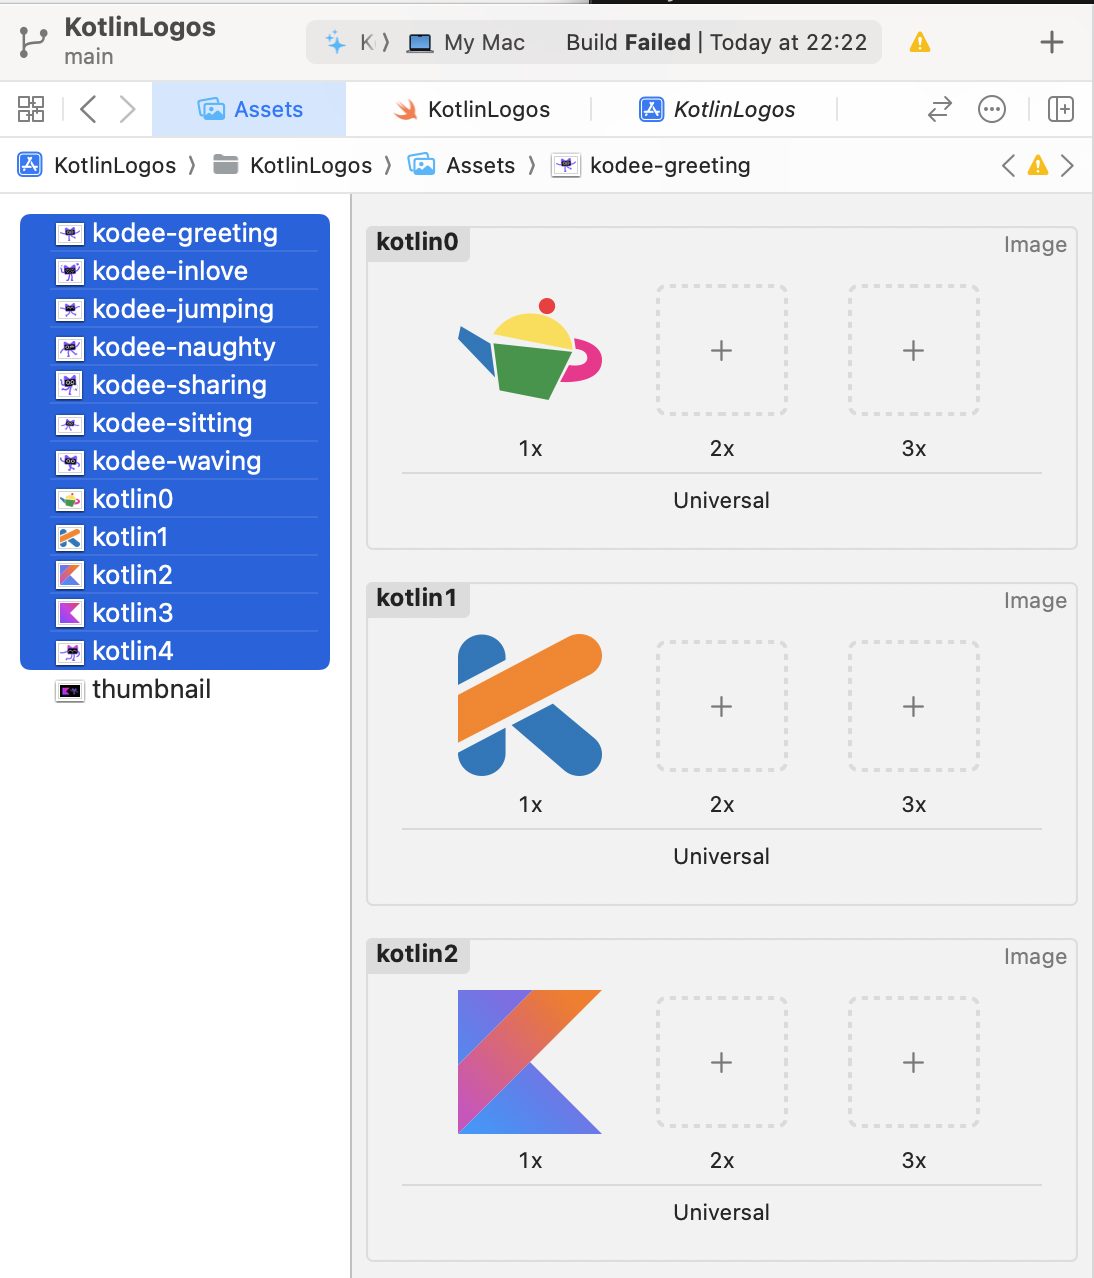
For some reason I initially thought these assets could not be SVGs, so I used huge PNG files, as you can see in the history of the repository. However, SVGs actually work just fine too, so that’s what the current implementation uses.
Shout-out to Boxy SVG, which I found while trying to make some minor edits to the Kotlin logos that I had. It’s a super simple and useful tool.
Accessing these assets is possible through a Bundle - or an NSBundle when looking at it from Kotlin. This is simple enough, using the name of the asset:
val image: NSImage = bundle.imageForResource("kodee-greeting")
However, for a good while I could only instantiate the NSBundle to work with in Swift code:
let bundle = Bundle(for: type(of: self))
… and then I passed this to the Kotlin code. I wanted to move the creation of the Bundle to the Kotlin side as well, but I did not find a way to express type(of: self) in Kotlin code.
Through some debugging, I eventually found the following solution instead, which grabs the Bundle based on the app’s identifier:
val bundle = NSBundle.bundleWithIdentifier("co.zsmb.KotlinLogos")!!
Storing preferences
Next, let’s look at making the screen saver user-configurable. The first step for this is to find a place for persistent value storage. The documentation says you’re supposed to use ScreenSaverDefaults. I have missed this initially and used UserDefaults instead.
This turned out to be lucky, as when I later tried moving to ScreenSaverDefaults instead, it failed to notify my screen saver of changes in values, and it also wouldn’t persist them through re-launches of the screen saver. I assume I was doing something wrong, but I ended up with reverting to UserDefaults as that works perfectly fine.
As with previous iOS APIs, this can be accessed seamlessly from Kotlin. I have a bit of a history of storing preferences using delegated properties, so I’ve applied that pattern again, like so:
class UserDefaultDelegate(private val default: Long) : ReadWriteProperty<Any?, Int> {
    private val userDefaults = NSUserDefaults()

    override fun getValue(thisRef: Any?, property: KProperty<*>): Int {
        return ((userDefaults.objectForKey(property.name) as? Long) ?: default).toInt()
    }

    override fun setValue(thisRef: Any?, property: KProperty<*>, value: Int) {
        userDefaults.setInteger(value.toLong(), property.name)
    }
}
I’ve then created a Preferences object in my project to hold such values in a globally accessible place:
object Preferences {
    var LOGO_SET by UserDefaultDelegate(0)
    var LOGO_SIZE by UserDefaultDelegate(200)
    var LOGO_COUNT by UserDefaultDelegate(1)
    var SPEED by UserDefaultDelegate(10)
}
Lastly, I wanted my implementation to know whenever these values changed through the configuration panel, so that I can reload the logos. This is useful to immediately reflect changes in the System Settings preview, for example, without having to quit and reopen it.
This can also be easily set up, using NSNotificationCenter and NSUserDefaultsDidChangeNotification:
NSNotificationCenter.defaultCenter
    .addObserverForName(NSUserDefaultsDidChangeNotification, null, null) {
        initLogos()
    }
Configuration panel
Now that we know where to save values, it’s time to build the UI where the user can actually change them. This is the configuration panel that’s accessed through the Options… button in System Settings.
Building this panel required way more traditional UI work than anything else around the screen saver. Having no real experience with AppKit or UIKit made it an interesting challenge to figure out how to use the various constraint APIs to get the desired layout, even though I just had to stack things vertically and horizontally. My understanding is that programmatically creating UI elements is actually popular with these toolkits, but I could not really get behind that.
You can find what I’ve managed to cobble together in this file. It’s not spectacular, but it’s decently navigable code and it gets the job done.
The hardest part of this UI building was setting listeners on elements, such as the OK and Cancel buttons. In Swift, this would look something like this, referencing a method of the current controller class:
okButton.target = self
okButton.action = #selector(ViewController.performOk)
The first line here is easy enough, it’s the fancy selector that’s hard to translate to Kotlin. With some help from Florian Kistner (builder of KMP tooling for Fleet!), I eventually figured out that this sort of syntax works, naming a public function of the controller in a stringly typed manner:
target = this
action = NSSelectorFromString("performOk")
As I found this terrifying, I ended up wrapping it like so:
private fun NSControl.setListener(selfFunc: KFunction<Unit>) {
    target = this@KotlinLogosPrefController
    action = NSSelectorFromString(selfFunc.name)
}
Which gives us these kinds of neat use sites:
val okButton = NSButton().apply {
    setListener(::performOk)
}
Here, again, aggressively quitting System Preferences before deploying a new build of your screen saver comes in handy. If you don’t do this, it’s more than likely that the configuration UI will keep running an old instance without your latest changes. I learned this quickly after an hour or two of debugging.
Debugging
Screen savers are interesting applications to debug. You can’t really run them in debug mode to place breakpoints, and you also can’t really run them directly from the IDE to even just capture logs easily.
This article from 2005 is (unfortunately) still an important article in the screen saver topic. It has a tip to automatically copy the newly built screen saver on top of the old one — I did not try this, though some of the issues I was having would have definitely broken this. Another good strategy from the past was to invoke the system’s ScreenSaverEngine in debug mode, make it host your screen saver, and have Xcode connect to it for debugging purposes. As far as I understand, this is no longer possible due to new OS level protections that don’t allow you to do this to ScreenSaverEngine.
The best idea I saw pop up in discussions was in this comment on StackOverflow, which is to create a macOS application within your Xcode project that takes your ScreenSaverView implementation and displays it in a window. I have tried this briefly and failed to get through configuring this in Xcode. I assume it’s possible to do if you’re more familiar with the tool.
So with that, I was stuck with testing my screen saver in production, by installing it and starting it as normal every time I’ve changed something. I also used the following:
- Another tip I need to thank Florian for teaching me was that I can use
NSLogto log things from my screen saver, and then I can open the macOS Console app to start listening for logs and filter for the ones that my screen saver produced. I also saw the occasional screen saver process crash here, which was useful. - I built myself some “debug mode” functionality within the screen saver itself, controlled by a boolean flag that I’d change manually for debug and release builds. When this was turned on, I’ve added
NSTextViewinstances to the UI and then set them to display strings of debug information, like coordinates and indices. I’ve since removed this in an effort to optimize the screen saver code, but you can go to this revision to check out how it worked.
Previews
The System Settings dialog for setting up screen savers offers a nice, but tiny preview of your screen saver when you select it. It does this by instantiating your ScreenSaverView implementation and running it in a process called legacyScreenSaver (Screen Saver (System Settings)). It’s definitely descriptive!
This comes with a fun challenge: the code you write to display at full screen sizes (the screen size on my MacBook measures as 2056 x 1329) is forced into a much, much smaller space (143 x 80 on my machine). If you’ve been hardcoding bouncing Kotlin logos that are 200–400 wide on their own, you’re going to have a bad time, and this preview will just keep crashing.
My workaround for this was to compute a magic multiplier that I then use to scale all dimension measurements by. You can find the implementation in this file. Thanks to this, not only does the screen saver work fine in the tiny preview window, but it also has pretty reasonable sizing for its elements on screens of different sizes, ratios, and densities.
Thumbnails
To give your custom screen saver a nice thumbnail image in System Settings, you have to add an asset called thumbnail to your project.
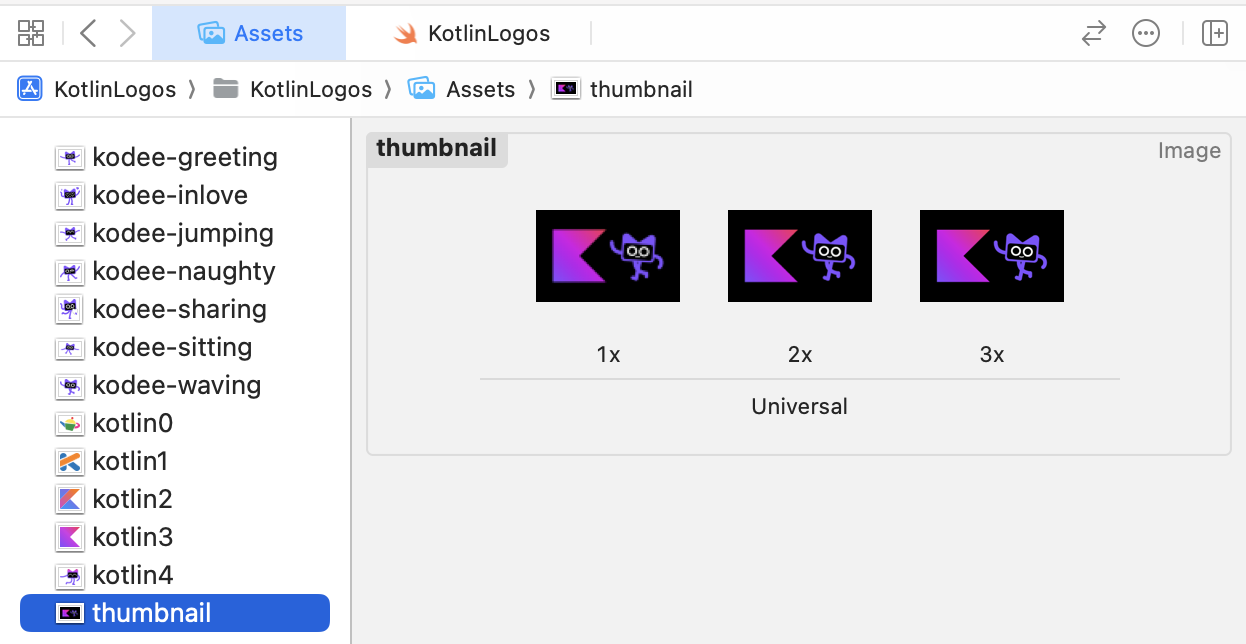
This gives you something like this:
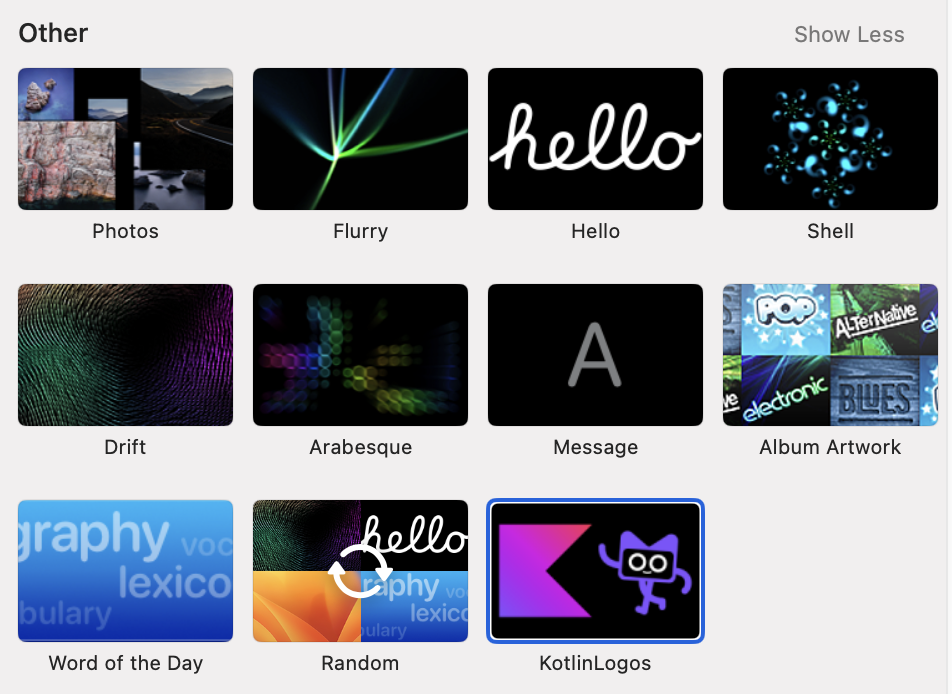
There’s a well-known bug which makes these thumbnails look awful for custom screen savers, which I also experienced while creating mine. However, I think updating to Sonoma might have actually fixed this, because it seems alright now.
Distribution
To properly ship a screen saver, the distribution steps are very similar to distributing any other macOS application.
The signing part for a screen saver is slightly complicated, but this article seems to describe it really nicely. This is a shockingly good resource considering the general availability information in this whole topic.
However, this does still require an Apple developer account, which costs about $99 more than what it’d be worth for me at this time. This leaves me without a nicely signed release version of my screen saver.
To get the Kotlin Logo screen saver, you can either take the unsigned release binaries from the GitHub releases page that I’ve published and click through the warnings that macOS presents, or clone the project and build it yourself.
macOS Sonoma
More like custom screen savers no ma’, am I right..?
The latest version of macOS at the time of writing is Sonoma, which was released while I was developing this screen saver and writing up this post. Sonoma has apparently brought two great new updates in the realm of screen savers:
- Fancy new screen savers built-in to the OS, making people more likely to stick to these than go for custom ones.
- Tons of new bugs and problems around custom screen savers. It seems like Sonoma has trouble properly shutting down the
legacyScreenSaverprocess that hosts any customScreenSaverView. This can cause various problems, including unnecessary CPU use, severe memory leaks, and complete crashes of a custom screen saver where it will just show up as a blank black screen.
Here are a few examples of these issues being reported…
What’s really happening
Here’s how that latter problem works in detail, from my testing:
- When your screen saver is first displayed, the
legacyScreenSaver (Wallpaper)process starts, and an instance of yourScreenSaverViewimplementation is created and added to view, displaying the screensaver. So far so good. - When you dismiss the screen saver and your content is no longer visible, this process keeps going in the background, running your
ScreenSaverViewcode, still calling methods likeanimateOneFramerepeatedly (in the case of my code, bouncing Kodees around constantly). This seems to keep going indefinitely. Uh-oh. - When you enter the screen saver again, the process is reused, but a new
ScreenSaverViewis created and displayed. The old one still doesn’t get dismissed however, it keeps hanging out in the process next to the new one.
As you might be able to tell at this point, this leads to a fascinating stacking of actively spinning ScreenSaverView instances over time, as you show and dismiss the screen saver. Depending on the intensity of the screen saver implementation (in our example, how many logos you have bouncing and how fast), these can add 1–10% CPU usage with every new stack. Somewhere above 100%, the process gives up and simply fails, requiring you to force quit it to see your screen saver again.
Warning: rapidly flashing video below. (Video is at 2x speed)
In previous macOS versions, the
ScreenSaverViewwould no longer receive callbacks after it’s dismissed, as one might reasonably expect.
At this point, you might also wonder what happens when you have multiple displays connected, as visually, these all run their own independent copies of your custom screen saver. As an example, for three displays the implementation creates three instances of your
ScreenSaverView, which are all hosted in the same process. Dismissing and entering the screen saver again creates three new instances of yourScreenSaverViewagain. So the more displays you have, the faster you’re stacking up invisible, leaking views.
The challenge, then, is to figure out when your ScreenSaverView isn’t being shown anymore, and dealing with that scenario in the best way possible. For a start, it’d be nice if the instances that are no longer visible wouldn’t do any work when their methods are called. Even better would be to be able to destroy them (or at least all but the latest instance). Ideally, we should be able to shut down the screen saver entirely once it’s dismissed.
How do we fix this
The superclass has startAnimation and stopAnimation methods which I never needed to use in my implementation, but figured I could attempt to use here. One of the first mitigation strategies I tried was to simply set a flag, and skip doing any work in animateOneFrame after stopAnimation has happened.
This was clearly naive, which I realized as I kept testing and saw that stopAnimation is essentially never called in production, only in the System Settings preview.
During my testing, I saw that global variables are kept around through instances, as the process hosting these stacking views is the same one over time. You can use this, for example, to count how bad the situation has gotten:
var viewCount = 0

class KotlinLogosView: ScreenSaverView {
    override init?(frame: NSRect, isPreview: Bool) {
        super.init(frame: frame, isPreview: isPreview)

        NSLog("Created instance \(viewCount)")
        viewCount += 1
    }
}
You can also use it to keep track of the previous instance of the view, and remove it from its parent when a new one is created in its place:
var previousView: ScreenSaverView? = nil

class KotlinLogosView: ScreenSaverView {
    override init?(frame: NSRect, isPreview: Bool) {
        super.init(frame: frame, isPreview: isPreview)
        if let prev = previousView {
            prev.removeFromSuperview()
        }
        previousView = self
    }
}
This sort of helps (as long as you have a single display), as it makes sure that there’s only ever one active instance of the ScreenSaverView. However, it still doesn’t shut that instance down when the screen saver is dismissed, so you have a spinning screen saver in the background eating up resources 24/7.
Having been able to save this previousView reference, I figured I could check various properties of the previous view at the time when the new view is being created. If I found a property that tells me that previousView isn’t actually visible, perhaps I could check for the value of that property in animateOneFrame, and shut down my view manually.
I tested a dozen different properties describing whether the view is animated, hidden, whether its window is the main or key window, and so on, and so on. I did not find anything that would change its value at the time when the screen saver is dismissed.
Seeing earlier how I could react to changes in NSUserDefaults values using notification observers, I’ve tried searching the list of available notification types, and I subscribed to several like NSApplicationDidHideNotification. None of these were being called when the screen saver was dismissed either. Another dead end.
Eventually, after even more searching around, I found some answers describing another approach of subscribing to events. This included willstop and didstop events, and these are actually delivered to your screen saver! 🤯
In theory, either of these two events should be fine to catch and react to, but I had a test run where only the willstop one was being caught, so I’ve stuck to using that. Your mileage may of course vary.
class KotlinLogosView: ScreenSaverView {
    override init?(frame: NSRect, isPreview: Bool) {
        super.init(frame: frame, isPreview: isPreview)
        DistributedNotificationCenter.default.addObserver(
            self,
            selector: #selector(KotlinLogosView.willStop(_:)),
            name: Notification.Name("com.apple.screensaver.willstop"),
            object: nil
        )
    }

    @objc func willStop(_ aNotification: Notification) {
        // Do something!
    }
}
The only remaining question is, what to do when this happens? I initially made a self.removeFromSuperview() call, which nicely shuts down the ScreenSaverView when it should. When doing this, the legacyScreenSaver process still sticks around 24/7, but consumes a negligible amount of resources.
I have later figured out that I can also just shut down the entire process programmatically, which seems to not cause any practical issues. To only handle the fullscreen mode of our screen saver and not when it’s being previewed in System Settings, we’ll wrap this action in a check of the isPreview property.
@objc func willStop(_ aNotification: Notification) {
    if (!isPreview) {
        NSApplication.shared.terminate(nil)
    }
}
Now, could I move this to Kotlin? I think I could. But I’ll just pretend that the bugs here will eventually get fixed, and then I can remove this code instead of moving it.
macOS Tahoe (October 2025 Update)
It wouldn’t be a new macOS version if it didn’t break custom screen savers, would it now?
macOS Tahoe breaks the fix presented above for process termination, because it fires the willStop notification a little too early, such that there’s still some time after the notification but before the full dismissal of the screen saver. In this tiny gap, macOS quickly restarts the screen saver process, trying to display the screen saver again for a split second. However, no willStop call will happen to this instance of the screen saver once it’s fully dismissed.
The fix then is simple: terminate the process just a little bit (for example, one second) later:
@objc func willStop(_ aNotification: Notification) {
    if (!isPreview) {
        DispatchQueue.main.asyncAfter(deadline: .now() + 1.0) { // 1 second from now
            NSApplication.shared.terminate(nil)
        }
    }
}
Conclusion and resources
Check out the GitHub repository for the screen saver where you’ll find builds, installation instructions, and all the code. Star it, open PRs, file issues. Buy it, use it, break it, fix it.
I’ve also created a blank starter project for Kotlin-based macOS screen savers which you can use if you want to build your own.
Finally, here are some other screen saver projects I found while researching this topic which seem like they might be useful to reference:
You might also like...
How I Finally Memorized Modifier Ordering in Compose
For the longest time, I proudly had no idea of how Modifier ordering works, and would just guess and then guess again when something didn't look quite right. Here's how I finally ended up remembering how the ordering works.
Setting up Compose Multiplatform previews
Compose Multiplatform now has support for previews in common code. Here's how you can get started with using them.
The conflation problem of testing StateFlows
StateFlow behaves as a state holder and a Flow of values at the same time. Due to conflation, a collector of a StateFlow might not receive all values that it holds over time. This article covers what that means for your tests.
Wrap-up 2021
Another year over, a new one's almost begun. Here's a brief summary of what I've done in this one.